Learn how to build and edit landing pages on Norby.
To reach the landing page editor, follow one of the steps listed below:
- From the Norby Dashboard, simply choose Edit link in bio if you want to edit your main link-in-bio landing page.
If you want to edit a landing page that is not your link in bio page: - From the left-hand navigation menu, choose the Landing Pages option.
- Select a Landing Page and then choose the Edit option by hovering over More.
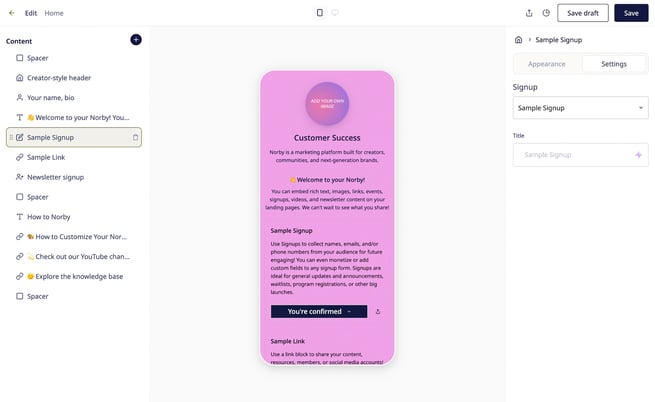
If you would like to create a new landing page, please follow these steps:
- Go the left-hand navigation menu and select Landing Pages.
- Choose the NEW option in the right-hand corner to launch the editor.
Overview the Landing Page Block Editor
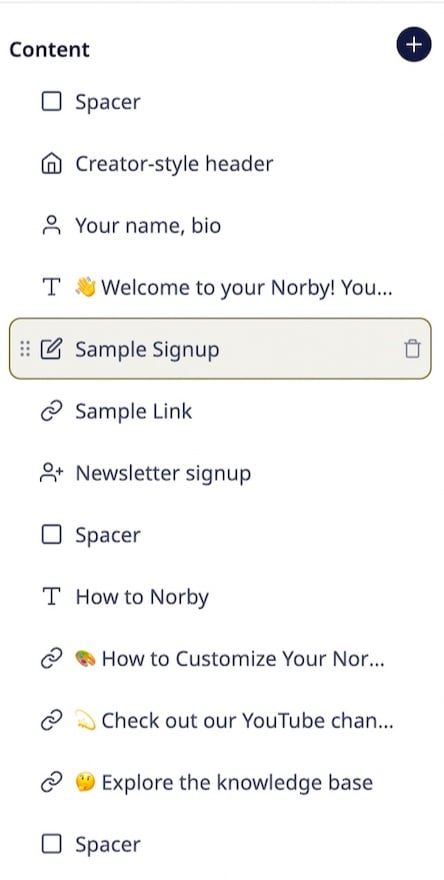
The left hand menu is the block editor.
To the right, you are able to see all of the landing page elements, ie: blocks, that can be edited. You can also use the + button to add new blocks.
Whether it is a new or existing block, you are able to hover over it and move the block up or down to adjust the order as you see fit for the page.
The landing page preview will update in real time when any edits, additions, or reordering changes that you make. Additionally, you are able to preview your page in desktop and mobile format.
In the example shown below, we'll edit a Rich Text field. The text box will appears under Settings where you can edit in real time while simultaneously tracking changes via the preview.

Available Block Types
Here is a list of the available block types when creating your Landing Page on Norby:
Basic - Rich Text, HTML, Image, Profile, and Social Icons.
Content - Event, List of events, Newsletter, List of newsletters, Newsletter Signup, Link, and Signup.
Embed - YouTube, Vimeo, Calendly, and Spotify. For in depth how-to's check out these articles:
Layout - Header, Spacer
Overview of the Landing Page Appearance Editor
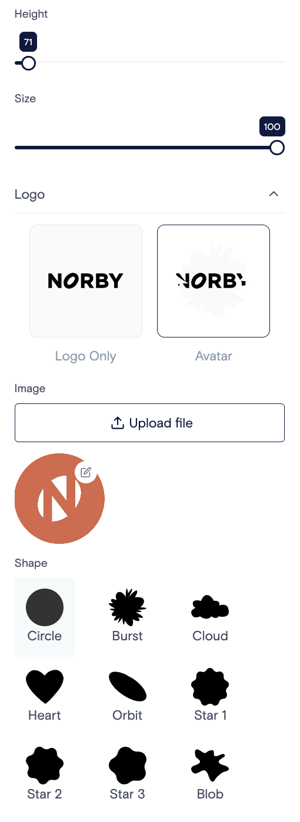
When it comes to editing a particular block's appearance the workflow enables things to be done efficiently and with ease.
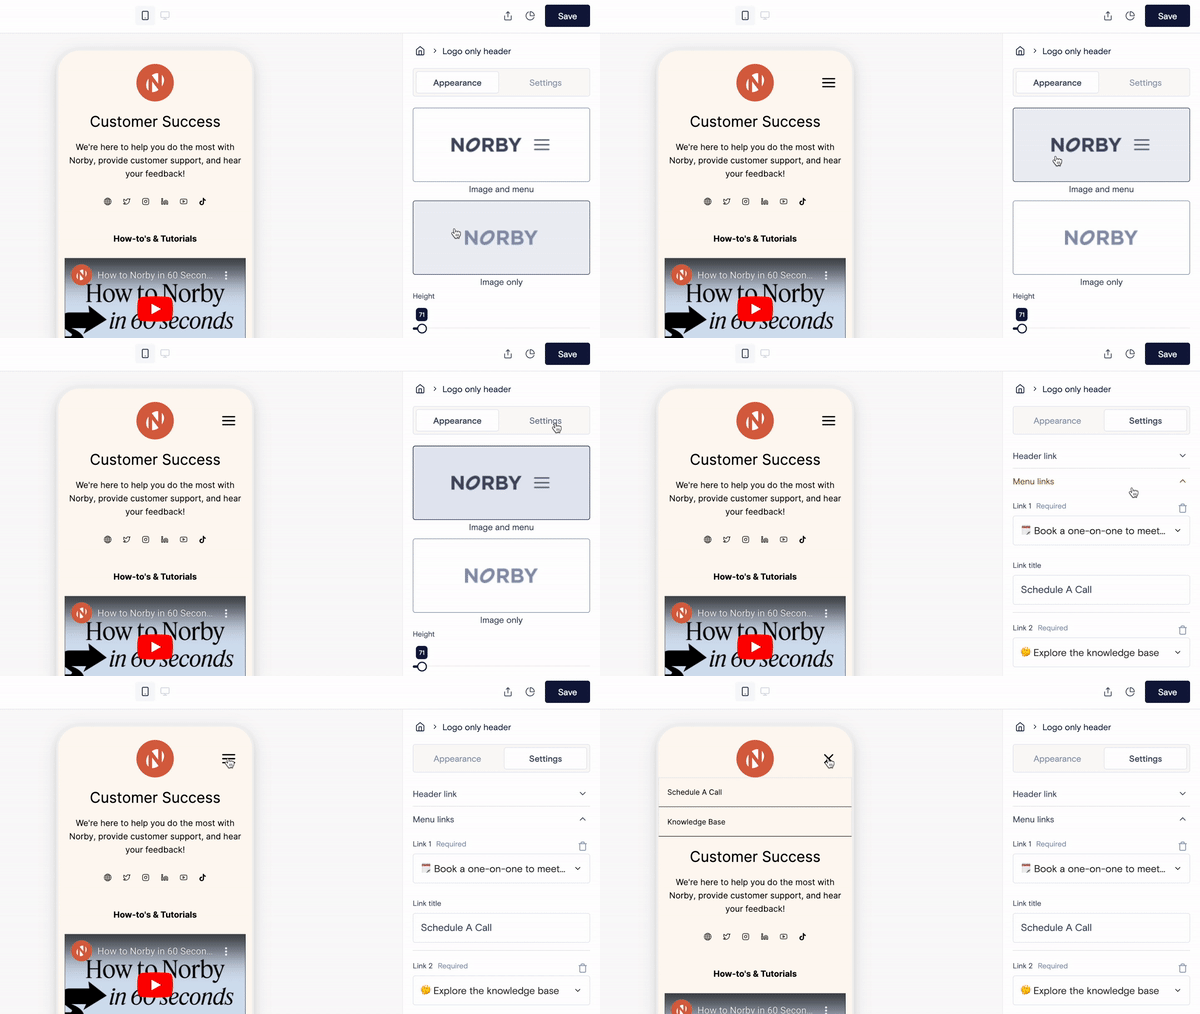
In our example to the left, we're looking at the Appearance section for the Header Block. You have the option to change only the Logo or Avatar. We'll go over the Avatar option.
To adjust the Height, simply click-and-drag the slider bar to increase or decrease as needed.
Additionally, you can choose a unique shape for the Avatar or upload a new file to help give the page your desired feel.
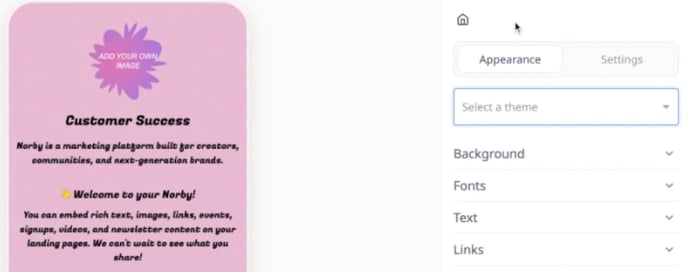
Should you want to change the overall style of the page, click on the home icon. From the choices shown below you can apply a pre-set theme or by individually editing page elements. To choose a theme or edit an element, click on the corresponding choice's dropdown arrow to begin finalizing appearance options for that item.
Final Steps
When you are finished creating your landing page on Norby, follow these steps:

- To publish the landing page, select the Save button.
- If you aren't finished or don't want the page to go live just yet, select the Save draft button.
- When you explicitly click on "Save" in the upper right-hand corner, your draft will be saved and you can continue working on it without being redirected to the dashboard. This feature is designed to improve your productivity and convenience as you create and refine your content within our platform.
-
 enables you to share the landing page by copying the link or copying embed code.
 - Finally, in-between the share icon and the save draft box is a link the Analytics page. Here you can review the page's performance. To learn more about page analytics, click here.
We also have a created a step-by-step video overview of this feature; see below:
