Utilize our Signup Form blocks to collect detailed information from your audience to stay in touch.
How to Create a Signup
- From the left-hand menu, select Signup Forms.
- Next, select the +New option in the right hand corner.
You will now be redirected to the Signups builder page, see below;
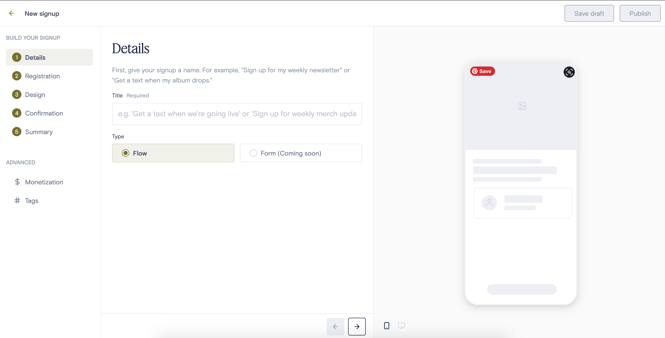
Section 1: Details
This section is where you will build out the format of your signup form.
- Title = what is the name of the signup form
- Type = how you want to present your signup questions
- Flow = only present one question at a time per page (like a conversation)
- Form = present all questions at once (like a list)
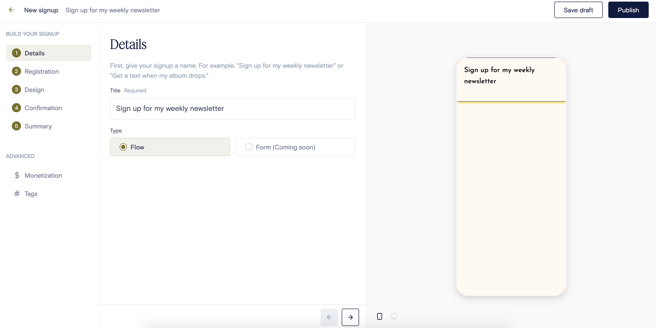
Once the above-mentioned information is filled in, your signup form page will look like this:
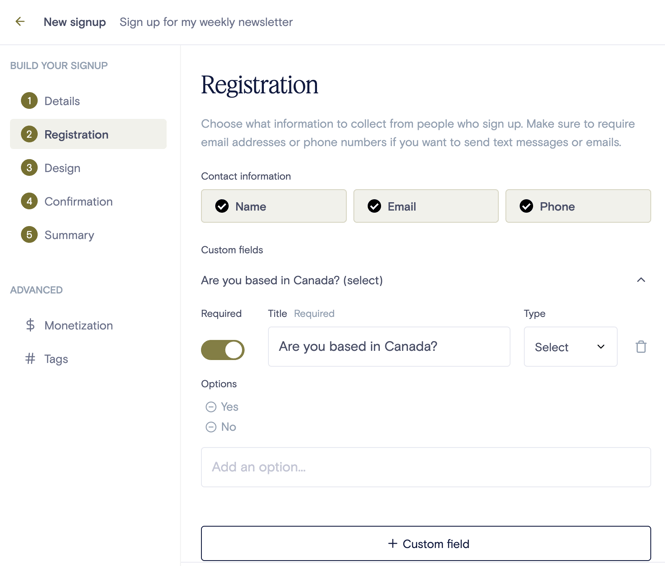
Section 2: Registration
This section is where you will choose what information you want to collect from registrants.
-
- You can require one, two, or all three of the following options on a registration:
Name, Email, and/or Phone.
-
- We recommend that you also take advantage of Custom Fields. This enables you to ask a variety of questions that can later be used to segment your signup registrants to give them a personalized follow-up.
- Required = toggle this button on to denote that the field requires a response
- Title = state your question or prompt
- Type = choose the format of the response such as Text, Select, or Checkbox
- If Select or Checkbox are chosen as the Type, you can then create response Options that signup registrants can choose from. To add more than one Option, hit Enter on your keyboard.
- We recommend that you also take advantage of Custom Fields. This enables you to ask a variety of questions that can later be used to segment your signup registrants to give them a personalized follow-up.
Example of Signup Registration with a Custom Field Question
-
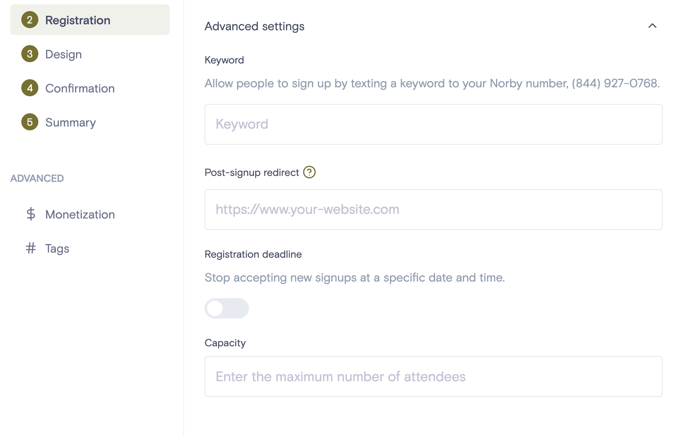
- Furthermore, you can utilize the additional options found in Advanced Settings:
- Keyword signups - This will allow your audience to text your Norby phone number and register for the signup. (Note: If only a phone number is required, the signup will be instantaneous. However, if name and/or email is required the system will text the recipient a link to complete registration.)
- Post-signup Redirect - Send your audience to a new URL after they register
- Password - You can gate the event by requiring a password to access.
- Capacity - This enables you to only allow for a certain number of registrants.
- Furthermore, you can utilize the additional options found in Advanced Settings:
Example of the Advanced Settings options in Signup Registration
Section 3: Design
This section is where you will design the look and feel of your signup page's design.
-
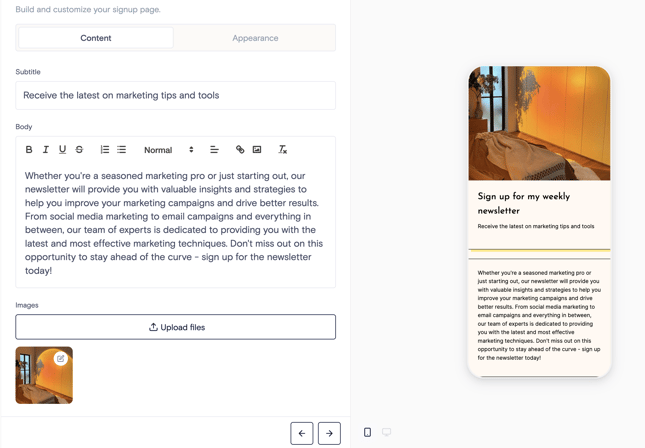
Content - Here you can choose your signup’s subtitle, create a detailed description of your signup via the body section, and image if you'd like to style your signup.
-
Appearance - Select a prebuilt Norby theme or customize the signup page based on your individual choices. A quick note that appearance settings will default to whatever you have chosen for your specific Norby account.
-
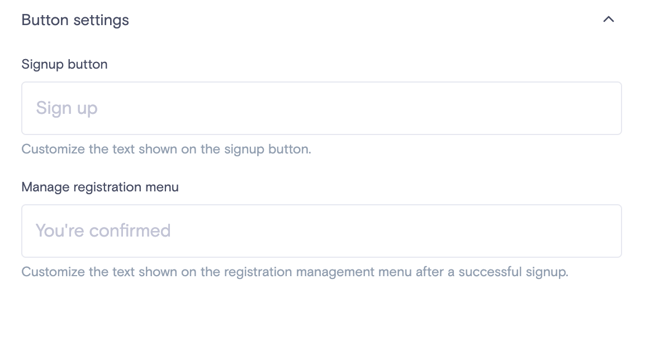
Button settings - In this dropdown menu, you can customize the text on various buttons such as the call-to-action or post-registration menu.
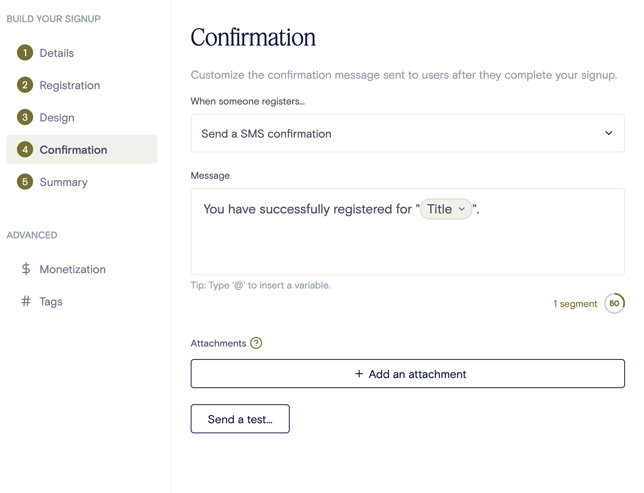
Section 4: Confirmation
You can setup the confirmation message sent to users after they complete your signup. Choose between the following options:
- Don’t send a confirmation
- Send a SMS confirmation
- Send an email confirmation
You can also attach images and videos, as well as send out a test message for the above-mentioned confirmation notification.
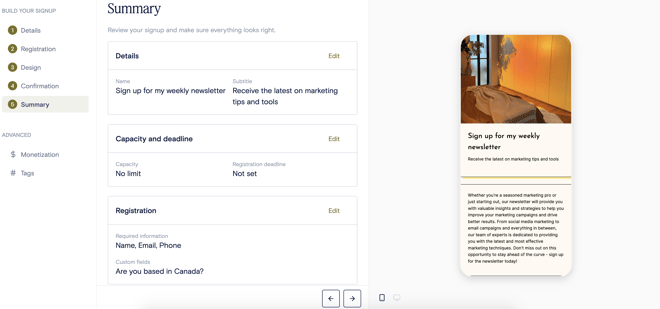
Section 5: Summary
This is simply where you will review everything that you've built out so far to see if you'd like to make any changes before publishing the page and having it go live. You can simply hit the edit button if you would like to make any changes to any of the sections shown below:
Monetization - $
- Ticketing - You can charge for access with Norby's ticketing. To set this up, you'll need to link your Stripe and Norby accounts. Here are instructions for both things.
- Donations - Additionally, you can set up donations for a signup on Norby. We've made a separate guide to walk you through that setup process, click here.
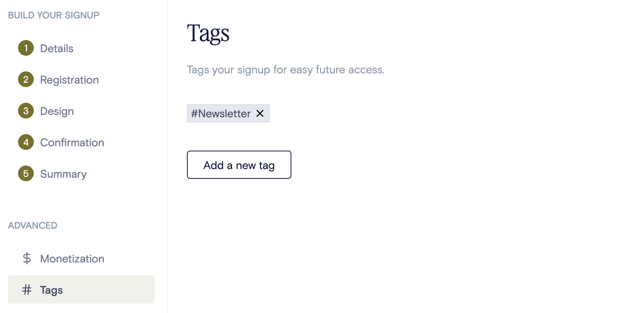
Tags - #
-
You can automatically assign a tag that will automatically populate on the registrant's contact record. This will allow you to segment certain messages via Send to a specific tag(s). For example, a musician could utilize the city and tour name as tags, as shown below, to send out targeted messages in the future.
FYI
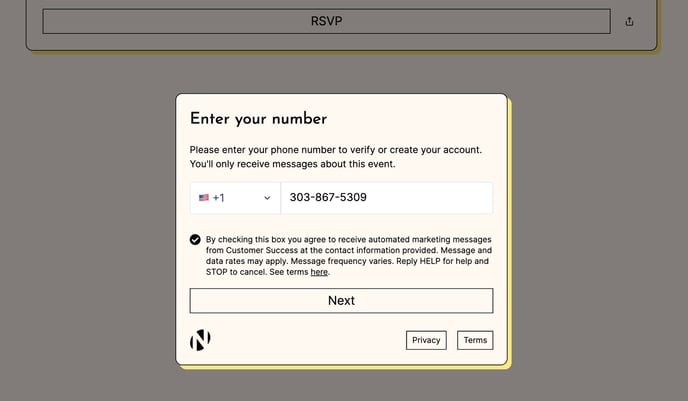
When a member of your audience registers for a signup, you will be able to send them updates regarding what they've signed up for. Additionally, you will be able to message them 1:1 using the Norby Inbox. However, the registrant will need to sign up for automated marketing messages (as shown below) in order to receive mass sms or email messages sent using Norby's Sends feature.
Saving & Publishing Your Signup Form
- When you create an Event, Signup Form, Page, or Send, any changes you make will automatically be saved as a draft. Additionally, if you explicitly click on "Save" in the upper right-hand corner, your draft will be saved and you can continue working on it without being redirected to the dashboard. This feature is designed to improve your productivity and convenience as you create and refine your content within our platform.
- Please note that once you have published or scheduled your content, our system will no longer be able to automatically save your progress. This is because the event, sign-up, page, or send is already live. Therefore, you will have to explicitly publish any new changes you make from that point onwards.
Further Reading
- To review your signup’s performance be sure to dive into the Analytics for the signup. You can learn more by clicking here.